
Can you make a dog bed cover? Yes, you absolutely can! Making your own dog bed cover is a fantastic way to save money, customize your pet’s sleeping space, and ensure it’s easy to clean. This guide will walk you through simple, DIY dog bed cover projects, including no-sew dog bed cover ideas and options for sewing dog bed cover designs. You’ll also find tips for creating a washable dog bed cover, a waterproof dog bed cover, and how to craft a perfect dog cushion cover or dog bed slipcover tutorial. Let’s dive into making your very own custom dog bed cover!
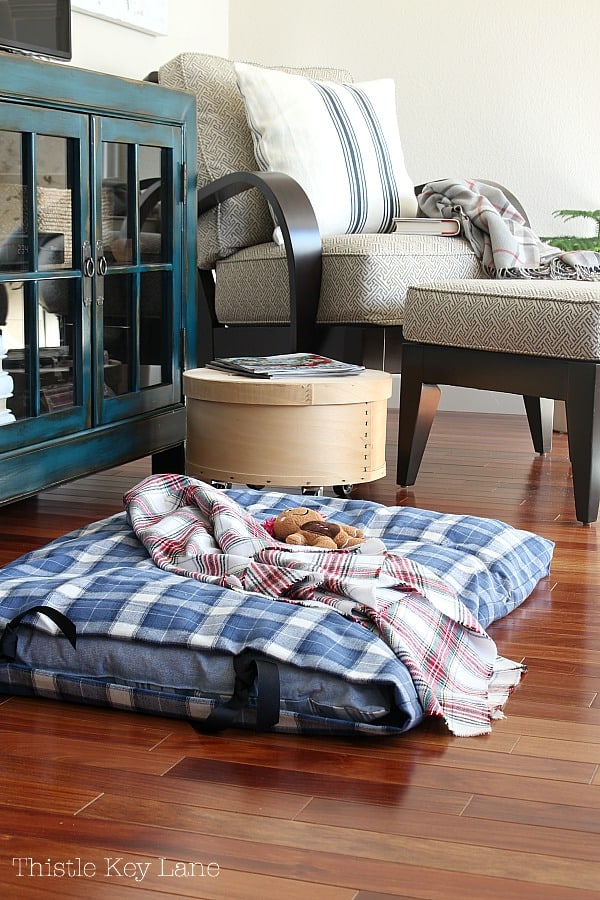
Image Source: thistlekeylane.com
Why Make a DIY Dog Bed Cover?
Your dog spends a lot of time sleeping and lounging on their bed. Over time, these beds can accumulate fur, dirt, drool, and odors. A removable and washable cover is essential for hygiene and keeping your home smelling fresh.
Benefits of a Homemade Cover:
- Cost Savings: Buying pre-made covers can be expensive, especially for larger or specialty dog beds. DIY is often much cheaper.
- Customization: You can choose fabrics that match your home decor, are durable, or have specific properties like being extra soft or waterproof.
- Perfect Fit: You can tailor the cover to fit your dog’s bed exactly, ensuring it stays in place.
- Easy Cleaning: A removable cover makes washing a breeze, keeping your dog’s sleeping area clean and hygienic.
- Durability: You can select high-quality fabrics that will withstand frequent washing and your dog’s wear and tear.
Planning Your DIY Dog Bed Cover
Before you start, a little planning goes a long way. Consider these factors:
1. Measuring Your Dog Bed
Accurate measurements are key!
- Length: Measure from one end of the bed to the other.
- Width: Measure across the widest part of the bed.
- Height/Depth: Measure from the bottom of the bed to the top.
How to Measure: Use a flexible measuring tape. If your dog’s bed is very fluffy or irregularly shaped, try to get a measurement that accounts for the loft (how puffy it is).
2. Choosing the Right Fabric
The fabric you select will determine the cover’s feel, durability, and washability.
Fabric Types to Consider:
- Cotton: Breathable, soft, and easy to wash. Good for everyday use. Look for sturdy cottons like quilting cotton or canvas.
- Fleece: Very soft and cozy, great for warmth. Can attract a lot of fur, so look for anti-pill varieties.
- Denim: Durable and tough. Can be a bit stiff initially but softens with washing.
- Canvas/Duck Cloth: Extremely durable and can be more resistant to wear and tear.
- Upholstery Fabric: Designed for durability and often has stain-resistant properties. Can be a bit heavier and harder to work with if sewing.
- Water-Resistant/Waterproof Fabrics: Excellent for dogs who are prone to accidents or drool a lot. Often found with a vinyl or TPU coating.
Fabric Quantity Calculation:
Once you have your measurements (Length, Width, Height), you’ll need to add extra fabric for seams and ease.
- Length needed: (Bed Length + 2 * Bed Height) + Seam Allowance (e.g., 1 inch per side)
- Width needed: (Bed Width + 2 * Bed Height) + Seam Allowance (e.g., 1 inch per side)
Example:
If your bed is 30″ L x 20″ W x 5″ H:
* Length needed: (30″ + 2*5″) + 2″ = 42″
* Width needed: (20″ + 2*5″) + 2″ = 32″
You would need a piece of fabric at least 42″ x 32″. It’s always better to buy a little extra fabric than not enough.
3. Closure Options
How will you get the bed inside the cover and keep it secure?
- Zipper: A classic and secure closure. Great for a neat finish. You’ll need a zipper that is longer than the side you attach it to.
- Velcro: Easy to install, especially for no-sew options. Ensure you use strong, wide Velcro strips.
- Envelope Closure: Similar to pillowcases, where one side overlaps the other. This is a common and easy no-sew dog bed cover technique.
- Buttons/Toggles: Can be a decorative and functional closure, but might not be as secure for very active dogs.
Making a Dog Bed Cover: No-Sew Options
If sewing isn’t your thing, or you’re short on time, these no-sew methods are perfect. They create an attractive and functional washable dog bed cover with minimal effort.
Method 1: The Envelope Closure No-Sew Dog Bed Cover
This is perhaps the easiest way to create a DIY dog bed cover without any sewing. It’s essentially a large pillowcase for your dog’s bed.
What You’ll Need:
- Fabric (enough to cover your bed with overlap)
- Sharp fabric scissors or a rotary cutter and mat
- Fabric glue or strong double-sided fabric tape (like Wonder Tape or Hem Tape)
- Measuring tape
- Optional: Iron (for fabric glue/tape adherence)
Steps:
-
Measure and Cut Fabric:
- Lay your dog bed flat.
- Measure the Length (L), Width (W), and Height (H) of the bed.
- You’ll need one large piece of fabric. The dimensions will be:
- Fabric Length: Bed Length (L) + 2 * Bed Height (H) + 2 inches for overlap and edge finishing.
- Fabric Width: Bed Width (W) + 2 * Bed Height (H) + 2 inches for edge finishing.
- Example: For a 30″ L x 20″ W x 5″ H bed, you’d cut fabric: (30 + 2*5 + 2) = 42″ Length, and (20 + 2*5 + 2) = 32″ Width. So, a 42″ x 32″ piece.
-
Prepare the Fabric Edges:
- On all four sides of your fabric piece, fold over about ½ inch towards the wrong side (the side that will be inside).
- Secure this fold using fabric glue or double-sided fabric tape. Press firmly and allow it to set. If using glue, you might want to iron it to ensure a strong bond, following the glue’s instructions. This creates a clean, finished edge.
-
Create the Envelope Closure:
- Lay your fabric flat, right side up.
- Place your dog bed in the center of the fabric.
- Fold one of the longer sides of the fabric over the bed. This will be your first flap.
- Now, take the opposite longer side and fold it over the first flap. This creates the overlap for your envelope closure. The amount of overlap depends on the size of your bed, but 6-10 inches is usually sufficient for most medium to large beds. This second flap should extend slightly past the edge of the bed.
- Tuck the ends of this second, overlapping flap inwards by about ½ inch, creating clean, finished edges. Secure these tucked edges with fabric glue or tape.
-
Secure the Overlap:
- Once the bed is covered and the overlap is adjusted, you have two main options to keep it in place:
- Fabric Glue/Tape: Carefully lift the overlapping flap and apply fabric glue or double-sided tape along the edge of the flap underneath it. Press the overlapping flap down firmly. You might need to place heavy books on it while it dries for a strong bond. This is ideal for a more permanent no-sew cover.
- Velcro: For a closure that can be easily opened for washing, attach Velcro. Stick one side of the Velcro (hook or loop) along the underside of the overlapping flap. Then, stick the corresponding Velcro piece along the edge of the flap beneath it. Ensure good adhesion and alignment.
- Once the bed is covered and the overlap is adjusted, you have two main options to keep it in place:
-
Insert the Bed:
- Carefully slide your dog bed into the cover through the open envelope closure. Fluff and arrange it as needed.
This easy dog bed cover is simple, effective, and requires no special skills!
Method 2: The No-Sew Fleece Tie Blanket Cover
This is another super simple option, especially if your dog bed is a flat mat or cushion. It uses the soft, cozy texture of fleece.
What You’ll Need:
- Two pieces of fleece fabric (one slightly larger than the other if you want a finished edge)
- Your dog bed or cushion
- Sharp fabric scissors or rotary cutter and mat
- Measuring tape
- Optional: Ruler or straight edge
Steps:
-
Measure and Cut Fabric:
- Lay your dog bed on top of your larger piece of fleece.
- Cut the first piece of fleece to be about 4-6 inches larger than your dog bed on all sides. This will be the bottom layer.
- Cut the second piece of fleece to be the same size or slightly smaller than the first piece. This will be the top layer.
-
Layer the Fabric:
- Place the larger piece of fleece flat on your work surface, right side up (if there’s a discernible right/wrong side for your fleece).
- Center your dog bed on top of this fleece piece.
- Place the second piece of fleece directly on top of the dog bed, right side down. The edges of both fleece pieces should align, with the larger one extending beyond the bed.
-
Cut the Corners:
- To create the ties, you need to cut out a square from each corner of both layers of fabric. The size of the square should be equal to the amount of overhang you want for your ties (e.g., 4-6 inches).
- Cut through both layers of fabric simultaneously at each corner.
-
Create the Ties:
- Now, starting at one corner and working your way around, cut strips (about 1 inch wide and going up to the edge of the dog bed) through both layers of fabric. These strips will be your ties.
-
Tie It Up:
- Once all the strips are cut, carefully remove the dog bed.
- Tie the corresponding strips from the top and bottom layers together using a double knot. Continue this all the way around the perimeter of where the dog bed was.
- Once all the ties are secured, place your dog bed back inside the fleece tie cover. The ties will hold it snugly.
This makes a wonderfully soft and washable dog bed cover that’s incredibly easy to make!
Making a Dog Bed Cover: Simple Sewing Options
If you’re comfortable with a sewing machine or even hand-sewing, you can create more structured and durable covers.
Method 3: The Zippered Dog Bed Slipcover Tutorial
This method creates a professional-looking and very secure dog bed slipcover. It’s a great way to make a custom dog bed cover that won’t slip off.
What You’ll Need:
- Fabric (enough for your bed plus seam allowance)
- Sewing machine
- Thread that matches your fabric
- Zipper (at least as long as one side of your bed)
- Fabric scissors or rotary cutter and mat
- Measuring tape
- Pins
- Iron and ironing board
Steps:
-
Measure and Cut Fabric:
- Measure your dog bed: Length (L), Width (W), Height (H).
- Cut four identical rectangular pieces of fabric.
- Each piece should be:
- Length: (Bed Length / 2) + 1 inch seam allowance
- Width: (Bed Width / 2) + 1 inch seam allowance
- This will create a cover that is essentially four “panels” joined together to form a box.
-
Prepare and Attach the Zipper:
- Choose one of the four fabric panels. This will be your “zipper panel.”
- On this panel, measure in 1 inch from one of the longer sides and draw a line. Do the same on the opposite longer side.
- Fold the fabric along these lines, pressing with an iron to create crisp creases.
- Open the folds. You will have two creased lines where the zipper will go.
- Carefully open your zipper. Pin one side of the zipper tape to one of the creased lines, right sides together, ensuring the zipper teeth align with the crease.
- Using your sewing machine and a zipper foot, stitch along the edge of the zipper tape.
- Repeat for the other side of the zipper on the other creased line. Ensure the zipper is centered and the two sides meet neatly.
- Once stitched, carefully open the zipper slightly. Press the fabric panels flat and topstitch along the edge of the fabric where the zipper is attached, close to the zipper teeth. This secures the zipper and gives a clean finish.
-
Sew the Panels Together:
- Now you have your zipper panel and three other identical panels.
- Take one of the remaining panels and pin it to one side of the zipper panel, right sides together. Stitch along the edge, leaving the zipper opening free.
- Repeat with the next panel on the adjacent side of the zipper panel.
- Finally, attach the last panel to the remaining open side of the zipper panel. You will now have a U-shape with the zipper panel at the bottom.
-
Close the Four Corners:
- You now need to close the four corners of your dog bed cover.
- Take the two open edges where the panels meet at the top corners. Pin them right sides together and stitch along the edge.
- Repeat for the other top corner.
- You should now have a complete box shape with the zipper closure on one of the “sides.”
-
Box Corners (Optional but Recommended):
- For a neater fit and to accommodate the thickness of the dog bed, you can create “box corners.”
- With the cover still inside out, take one of the sewn corners. Flatten it so the seam you just made is aligned with the seam on the opposite side, forming a triangle at the corner.
- Measure across the triangle, perpendicular to the seam, a distance equal to your dog bed’s height (H) plus about ½ inch for ease and seam allowance. Draw a line across the fabric at this measurement.
- Stitch along this line.
- Trim any excess fabric beyond the stitch line, leaving about ½ inch for a seam allowance.
- Repeat for all four corners.
-
Turn and Insert:
- Turn the cover right side out.
- Unzip the zipper slightly.
- Carefully insert your dog bed into the cover. Zip it up completely.
This sewing dog bed cover method results in a durable, washable, and professional-looking slipcover.
Method 4: The Simple Pillowcase-Style Dog Bed Cover
This is a step up from the no-sew envelope but still very easy. It involves sewing three sides and creating a simple flap closure.
What You’ll Need:
- Fabric
- Sewing machine
- Thread
- Fabric scissors or rotary cutter and mat
- Measuring tape
- Pins
- Iron and ironing board
Steps:
-
Measure and Cut Fabric:
- Measure your dog bed: Length (L), Width (W), Height (H).
- Cut one large piece of fabric.
- Fabric Length: Bed Length (L) + 2 * Bed Height (H) + 2 inches (for seam allowance and hem).
- Fabric Width: Bed Width (W) + 2 * Bed Height (H) + 4 inches (this extra 2 inches is for the overlap).
-
Hem the Opening Edge:
- Take the fabric piece. On one of the longer sides (this will be your opening), fold over ½ inch towards the wrong side and press.
- Fold over another 1 inch and press again. This creates a double-folded hem.
- Stitch this hem in place using your sewing machine.
-
Prepare for Sewing:
- Lay the fabric piece flat, right side up.
- Place your dog bed in the center.
- Fold the side without the hemmed opening over the bed, bringing it to the center.
- Take the hemmed opening side and fold it over the first flap, creating an overlap. Ensure the edges are neat. Tuck in the ends of this overlapping flap by about ½ inch and press.
- This creates your envelope closure.
-
Sew the Sides:
- Pin the fabric securely around the dog bed to hold it in place.
- Carefully remove the bed.
- Stitch along the two shorter sides of the fabric, securing the cover. Use a straight stitch and backstitch at the beginning and end.
- Stitch the overlapped flap ends closed to keep them tidy.
-
Add Optional Securing:
- To prevent the cover from shifting too much, you can sew a few loose stitches or a button on the inside of the flap to hold it down.
This easy dog bed cover is a great compromise between no-sew and full zipper options.
Creating a Waterproof Dog Bed Cover
For dogs who have accidents or love to bring wet toys onto their bed, a waterproof dog bed cover is a lifesaver.
Using Waterproof Fabric:
- What to use: Look for fabrics specifically marketed as waterproof or water-resistant. These often have a coating (like PUL, TPU, or a vinyl backing). Outdoor fabrics like Cordura or certain canvas types with a waterproof coating can also work.
- Sewing: Waterproof fabrics can be trickier to sew as the needle holes can create small leaks.
- Use a microtex needle for cleaner punctures.
- Consider using fabric glue or tape for seams instead of extensive stitching.
- If sewing, use a walking foot to help feed the fabric smoothly.
- Use a waterproof sealant on the seams if you need absolute waterproofing (though for a dog bed cover, basic waterproofing from the fabric itself is often sufficient).
Method: Waterproof Envelope Cover (No-Sew)
- Follow the steps for the No-Sew Envelope Closure Dog Bed Cover (Method 1).
- Choose a waterproof or water-resistant fabric for your main piece.
- For the edges and overlap, use strong fabric glue or extra-wide double-sided fabric tape designed for outdoor or water-resistant materials.
Method: Waterproof Zipper Cover (Sewing)
- Follow the steps for the Zippered Dog Bed Slipcover Tutorial (Method 3).
- Select a waterproof fabric for all four panels.
- When sewing the zipper and seams, consider using a waterproof seam sealant after stitching to ensure maximum protection.
Caring for Your DIY Dog Bed Cover
Proper care will extend the life of your washable dog bed cover.
- Washing: Always check the fabric care label. Most fabrics can be machine washed on a gentle cycle with cold or warm water. Use a pet-safe detergent.
- Drying: Air drying is best for most fabrics, especially those with coatings. If using a dryer, use a low heat setting. High heat can damage waterproof coatings or cause shrinkage.
- Spot Cleaning: For minor messes, spot clean with a mild soap and water solution.
- Odors: Baking soda can be added to the wash to help neutralize odors. Ensure the cover is completely dry before putting it back on the bed.
Frequently Asked Questions (FAQ)
Q: What is the best fabric for a dog bed cover?
A: The best fabric depends on your dog’s habits. For durability and ease of cleaning, consider cotton canvas, denim, or a sturdy upholstery fabric. For comfort, fleece or a soft, washable cotton blend is great. For dogs prone to accidents, a waterproof or water-resistant fabric is ideal.
Q: Can I make a dog bed cover without a sewing machine?
A: Absolutely! The no-sew envelope closure and fleece tie blanket methods are excellent options that require no sewing machine. Fabric glue, fabric tape, and Velcro can create secure and functional covers.
Q: How do I make a dog bed cover fit tightly?
A: Accurate measurements are crucial. When cutting your fabric, add enough for seam allowances and a little ease. For sewn covers, creating “box corners” as described in Method 3 will help the cover fit snugly around the bed’s shape.
Q: How often should I wash my dog bed cover?
A: This depends on your dog and your home environment. A general guideline is to wash it every 2-4 weeks. If your dog has allergies, skin issues, or tends to get dirty or smelly, you might need to wash it more frequently.
Q: My dog chews everything. What fabric is best for a chew-proof cover?
A: While no fabric is truly “chew-proof,” very durable and tightly woven fabrics like heavy-duty canvas, denim, or ripstop nylon will offer the most resistance. Even then, for persistent chewers, supervision is advised. You might also consider reinforcing seams with extra stitching.
Making a DIY dog bed cover is a rewarding project that benefits both you and your furry friend. Whether you opt for a quick no-sew dog bed cover or a more structured sewing dog bed cover, you’ll end up with a clean, comfortable, and customized sleeping spot for your beloved pet. Happy making!