
Can you remove dog scratches from hardwood floors? Yes, you can! Minor scuffs and shallow dog claw marks can often be repaired at home, while deeper gouges might require professional attention or a more involved refinishing process. This guide will walk you through how to tackle those frustrating hardwood floor scratches caused by your furry friends.
Having a dog and beautiful hardwood floors can feel like a constant battle. Those adorable paws that bring so much joy can also leave behind a trail of unsightly marks. But don’t despair! With the right knowledge and tools, you can effectively repair dog scratches and restore the pristine look of your wood floors. Whether you’re dealing with light surface scuffs or more noticeable dog claw marks, there are solutions available. We’ll explore methods to repair dog scratches, remove pet scratches, fill dog gouges, and even when it’s time to refinish hardwood floors.
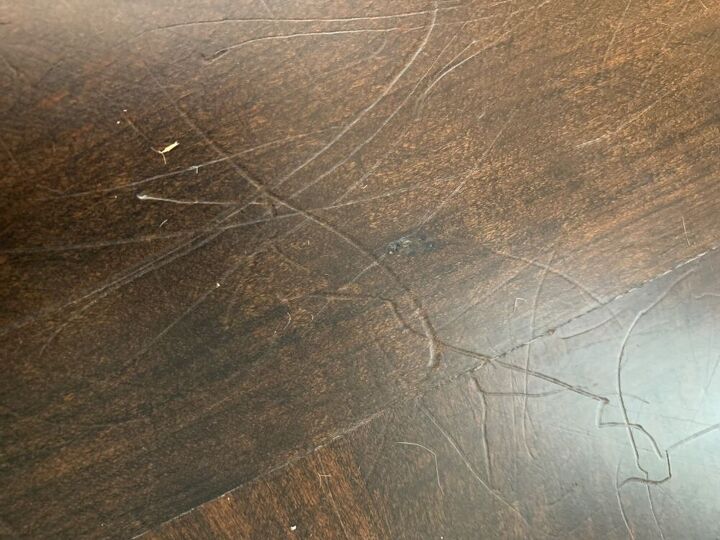
Image Source: cdn-fastly.hometalk.com
Battling the Blight: Identifying the Severity of Dog Scratches
Before you grab any cleaning supplies or repair kits, it’s crucial to assess the damage. Not all scratches are created equal, and the approach you take will depend on how deep they are.
Surface Scratches and Scuffs
These are the most common types of hardwood floor scratches. They typically only affect the top protective layer of the finish, like polyurethane. You’ll often see them as lighter-colored marks, sometimes appearing white or milky, especially on darker finishes. They don’t penetrate the wood itself.
- Appearance: Light discoloration, superficial marks.
- Depth: Only in the finish layer.
- Repair Difficulty: Low to moderate.
Moderate Scratches
These scratches go a bit deeper, perhaps into the stain or even slightly into the wood itself. They might be more visible as a definite line rather than just a discoloration. You might be able to feel a slight indentation with your fingernail.
- Appearance: More defined lines, potential for some wood grain showing through.
- Depth: Into the stain or shallow wood penetration.
- Repair Difficulty: Moderate.
Deep Gouges and Grooves
These are the most problematic. Deep gouges are significant indentations that go well into the wood itself, often exposing the raw wood. These are typically caused by something sharp, like a prolonged dragging of a dog’s claw, or a heavy object being dropped.
- Appearance: Deep cuts, missing wood, exposed raw wood.
- Depth: Deep into the wood.
- Repair Difficulty: High, often requiring specialized fillers or refinishing.
Easy Fixes: Tackling Light Dog Scratches at Home
For those minor surface scratches, you can often buff out scratches with simple home remedies and readily available products. These methods aim to mask or blend the scratch, or gently remove the damaged finish layer.
The Walnut Trick: A Classic Wood Scratch Solution
This is a popular and surprisingly effective method for very light surface scratches on stained wood floors. The natural oils in the walnut can help to fill and camouflage the scratch.
What You’ll Need:
- A few shelled walnuts (any kind, but English walnuts are common).
- A soft, lint-free cloth.
Steps:
- Select a Walnut: Choose a walnut that’s similar in color to your hardwood floor if possible.
- Rub the Scratch: Take a walnut and vigorously rub it back and forth along the length of the scratch. Apply firm pressure. The natural oils and the nutmeat will transfer into the scratch, helping to darken and disguise it.
- Wipe Away Excess: Use your lint-free cloth to gently wipe away any walnut residue.
- Assess and Repeat: See if the scratch is less noticeable. You may need to repeat the process a few times for best results.
- Buff: Once satisfied, you can gently buff the area with a clean part of the cloth.
Why it Works: The oils in the walnut help to condition and darken the exposed wood fibers within the scratch, making it blend in with the surrounding finish.
Coffee Grounds: Another Natural Camouflage
Similar to walnuts, coffee grounds can be used to darken scratches on dark wood floors.
What You’ll Need:
- Used, dried coffee grounds.
- A small bowl.
- A cotton swab or a soft cloth.
Steps:
- Mix: Place a small amount of dried coffee grounds in the bowl.
- Create a Paste: Add a tiny bit of water or mineral oil to the coffee grounds to create a thick paste.
- Apply: Dab the paste onto the scratch using a cotton swab or your fingertip.
- Let it Sit: Allow the paste to sit in the scratch for about 5-10 minutes.
- Wipe and Buff: Gently wipe away the excess paste with a soft cloth and then buff the area.
Important Note: This method is best for darker wood floors as coffee grounds are dark. Test in an inconspicuous area first.
Toothpaste (Non-Gel): A Gentle Abrasive
This method uses the mild abrasive quality of non-gel toothpaste to gently polish out light scuffs.
What You’ll Need:
- Non-gel white toothpaste.
- A soft cloth.
- A separate clean, damp cloth.
Steps:
- Apply Toothpaste: Squeeze a small amount of non-gel white toothpaste onto the scratch.
- Rub Gently: Using the soft cloth, gently rub the toothpaste into the scratch with a circular motion. Apply light pressure.
- Wipe Clean: Use the damp cloth to wipe away all the toothpaste residue.
- Dry and Buff: Dry the area thoroughly with a clean cloth and buff it to restore shine.
Caution: Avoid gel toothpastes, as they can contain harsh chemicals or dyes that might worsen the problem.
Intermediate Solutions: Repairing More Noticeable Scratches
When scratches are a bit deeper or the home remedies don’t quite cut it, you’ll need to consider specialized products designed to repair dog scratches and touch up wood scratches.
Wood Floor Scratch Repair Kits
These kits are specifically designed for wood floors and often come with various colored pens, markers, or crayons to match different wood tones.
What You’ll Need:
- A wood floor scratch repair kit (choose one that matches your floor color).
- A soft cloth.
- A fine-grit sandpaper (optional, for smoothing).
Steps:
- Clean the Area: Ensure the scratched area is clean and free of dust and debris.
- Select the Color: Choose the color from the kit that best matches your hardwood floor. It’s often best to start with a slightly lighter shade and build up color if needed.
- Apply the Color: Carefully apply the repair product directly into the scratch. If using a marker or pen, draw along the length of the scratch. If using a crayon or putty, press it into the scratch with your finger or a putty knife.
- Wipe Away Excess: Immediately wipe away any excess product with a soft cloth. You want the product to fill the scratch, not sit on top of the finish.
- Feather the Edges: For crayons or putties, gently feather the edges with the cloth to blend the repair into the surrounding finish.
- Buff: Once the color is applied and excess removed, buff the area to a slight sheen.
- Seal (if applicable): Some kits come with a clear sealant to protect the repair. Apply as directed.
Tip: It’s often easier to match a medium-tone wood by blending a light and dark repair product together.
Wood Floor Repair Pens and Markers
These are essentially colored markers that deposit pigment into the scratch. They are great for quick touch-ups on moderately deep scratches.
What You’ll Need:
- Wood floor repair pen or marker.
- Soft cloth.
Steps:
- Clean: Ensure the scratched area is clean.
- Match Color: Select a pen that closely matches your floor’s color.
- Apply: Carefully draw the pen along the scratch, filling it with color.
- Wipe: Immediately wipe away any excess color with the soft cloth. You want to fill the scratch, not color the surface.
- Buff: Lightly buff the area.
Wood Floor Scratch Filler and Putty
For deeper scratches, a wood floor scratch filler or putty might be necessary. These products are designed to fill the void left by the scratch.
What You’ll Need:
- Wood floor scratch filler or putty (choose a color to match your floor, or one that can be stained).
- Putty knife or plastic scraper.
- Fine-grit sandpaper (e.g., 220-grit).
- Soft cloth.
- Wood stain and finish (if necessary).
Steps:
- Clean the Scratch: Make sure the scratch is clean and free of debris.
- Apply Filler: Using a putty knife, apply the wood filler into the scratch. Press it in firmly to ensure it fills the entire depth of the gouge.
- Level the Surface: Scrape off any excess filler so it’s flush with the surrounding floor.
- Dry: Allow the filler to dry completely according to the manufacturer’s instructions. Some fillers shrink as they dry, so you may need to apply a second coat.
- Sand (if needed): Once dry and hard, lightly sand the filled area with fine-grit sandpaper to make it perfectly smooth and flush with the floor. Be careful not to sand the surrounding finish.
- Clean Dust: Wipe away all dust with a clean cloth.
- Color Match (if needed): If the filler is not a perfect color match, you may need to lightly stain the filled area or apply a touch-up marker to blend it in.
- Apply Finish: Once the color is right, apply a clear protective finish over the repaired area to match the sheen of the surrounding floor.
Dealing with Deep Gouges: When More is Needed
When dog gouges are significant, meaning they’ve removed wood and aren’t just scratches in the finish, you have a few options, ranging from more intensive DIY to professional help.
Using Wood Filler for Deep Gouges
This is an extension of using scratch filler but for more substantial damage.
What You’ll Need:
- High-quality wood filler (choose a stainable or paintable version depending on your floor finish).
- Putty knife.
- Fine-grit sandpaper (120-grit, then 220-grit).
- Stain pen or touch-up stain (if needed).
- Clear protective finish (matching your floor).
- Clean cloths.
Steps:
- Prepare the Gouge: Clean out the gouge thoroughly. If there are any loose splinters of wood, you can carefully trim them with a sharp craft knife.
- Apply Wood Filler: Generously apply the wood filler to the gouge using the putty knife. Press it in firmly, slightly overfilling it to account for shrinkage. Ensure the filler is pressed into every part of the gouge.
- Level and Smooth: Scrape away excess filler with the putty knife to make it as flush as possible with the surrounding floor.
- Dry: Let the filler dry completely. This can take several hours or even overnight depending on the product and the depth.
- Sand: Once dry, sand the filled area smooth. Start with 120-grit sandpaper to level it, then finish with 220-grit for a smooth finish. Be careful to only sand the filled area and not the surrounding wood.
- Clean: Thoroughly wipe away all sanding dust with a clean, dry cloth. You might want to follow up with a slightly damp cloth and then dry again.
- Color Matching: If the wood filler is a different color than your floor, use a stain pen or touch-up stain to carefully color the filled area. Apply sparingly, wiping away excess to blend it in.
- Seal: Apply a clear protective finish that matches the sheen of your existing floor. This is crucial to protect the repair and ensure it blends in. You might need a couple of thin coats.
Prevention: Stopping Dog Scratches Before They Start
The best way to deal with hardwood floor scratches is to prevent them altogether. Here are some proactive measures:
Regular Nail Trims
This is arguably the most important step. Keeping your dog’s nails trimmed short significantly reduces their ability to scratch your floors.
- Frequency: Trim nails every 2-4 weeks, depending on how quickly they grow.
- Technique: Use sharp dog nail clippers and avoid cutting the quick (the pink part of the nail). If you’re unsure, have a vet or groomer show you how.
- Grinding: Nail grinders can also be used to smooth the edges of the nails after clipping.
Paw Protection
For particularly active or scratch-prone dogs, consider paw protection.
- Dog Booties/Socks: These can be worn during playtime or when your dog is particularly energetic indoors.
- Paw Balm: Some paw balms can help strengthen and protect paw pads, although they won’t prevent scratches directly.
Area Rugs and Runners
Strategically placed rugs and runners can provide a protective buffer in high-traffic areas, like hallways and entrances, where dogs tend to run and slide.
Training and Behavior Modification
- Discourage Scratching: If your dog has a habit of digging or scratching at the floor, try to redirect this behavior. Offer them appropriate chew toys and praise them when they use them.
- Leash Training Indoors: For very young or boisterous dogs, a light leash indoors can help you guide them and prevent sudden sprints that might lead to scratches.
Protective Floor Coatings
When you’re installing new hardwood floors or undertaking a full refinishing project, consider a more durable finish.
- Polyurethane Finishes: Opt for water-based or oil-based polyurethane with a harder finish like a high-solids content polyurethane.
- Aluminum Oxide Finish: Some modern engineered wood floors come with an aluminum oxide finish, which is extremely durable and resistant to scratches.
When to Call the Professionals: Refinishing Hardwood Floors
If your hardwood floors have numerous deep scratches, extensive wear and tear, or if DIY repairs aren’t yielding satisfactory results, it might be time to refinish hardwood floors. This is a more involved process that essentially strips away the old finish, sands down the wood to remove imperfections, and then applies a new stain and protective coating.
The Refinishing Process
- Preparation: The room is cleared, and floors are thoroughly cleaned.
- Sanding: Heavy-duty drum sanders and edgers are used to remove the old finish and any surface damage. This is a dusty process, so professional sanders often use dust containment systems.
- Staining (Optional): If you want to change the color of your floors, stain is applied at this stage.
- Finishing: Multiple coats of a durable protective finish (like polyurethane) are applied. The sheen (matte, satin, semi-gloss, high-gloss) can be chosen by the homeowner.
- Drying and Curing: The floor needs to dry and cure for a period before furniture can be placed back and the room can be used normally.
Benefits of Refinishing
- Complete Restoration: Removes all scratches, dents, and wear.
- Updated Look: Allows you to change the stain color.
- Increased Durability: New, high-quality finishes offer better protection.
- Increased Home Value: Beautifully refinished hardwood floors are a significant selling point.
When Refinishing is the Best Option
- Widespread Damage: If scratches are all over the floor.
- Deep Gouges: If gouges are too deep to be filled effectively.
- Worn Finish: If the protective finish is completely worn off in many areas.
- Discoloration: If the floor has significant water damage or discoloration.
Keeping Your Floors Beautiful: Ongoing Care and Maintenance
Once you’ve repaired your scratches, maintaining your hardwood floors is key to keeping them looking their best and preventing future damage.
Daily Cleaning
- Sweep or Vacuum: Use a soft-bristle broom or a vacuum cleaner with a hardwood floor attachment daily or every other day to remove dust, dirt, and pet hair. Grit and sand are abrasive and can cause new scratches.
- Pet-Friendly Floor Cleaner: When a deeper clean is needed, use a pet-friendly floor cleaner specifically designed for hardwood. Avoid excessive moisture, as water can damage wood.
Damp Mopping
- Frequency: Damp mop only when necessary, perhaps once a week or less, depending on your household.
- Technique: Use a well-wrung-out mop. The mop should feel barely damp, not wet.
- Product Choice: Use a cleaner recommended for your specific type of hardwood finish.
Avoiding Moisture
- Wipe Up Spills Immediately: Don’t let any liquid sit on the floor.
- Pet Accidents: Clean up pet accidents immediately and thoroughly.
Furniture Pads
- Felt Pads: Ensure all furniture legs have felt pads to prevent scratches when moving furniture. Regularly check and replace worn pads.
Frequently Asked Questions (FAQ)
Q1: Can I use a regular furniture scratch repair kit on my hardwood floors?
While some furniture scratch repair kits might work for very minor scuffs, it’s best to use products specifically designed for hardwood floors. These are formulated to match wood tones and finishes and are less likely to cause further damage.
Q2: How do I know if my scratch is too deep to fix myself?
If you can feel a significant indentation with your fingernail, or if wood has been visibly chipped away, the scratch is likely too deep for simple home remedies. These types of dog gouges often require wood filler or a full refinishing.
Q3: What is the best pet-friendly floor cleaner for hardwood?
Look for pH-neutral cleaners specifically labeled for hardwood floors. Many brands offer formulas that are safe for use around pets and children and will effectively clean without damaging the finish. Always read the product label and test in an inconspicuous area first.
Q4: Can I buff out deep scratches on my hardwood floors?
No, buffing can only help with very light surface scratches or scuffs. Deep scratches that have penetrated the wood itself cannot be buffed out. They require filling or sanding and refinishing.
Q5: How often should I trim my dog’s nails to prevent scratches?
Trimming your dog’s nails every 2 to 4 weeks is generally recommended. This significantly reduces the sharpness of their claws and their potential to remove pet scratches from your floors.
Q6: What if my dog’s scratches are on an oiled hardwood floor instead of a finished one?
Oiled floors are treated differently. For minor scratches on oiled floors, you might be able to use a product called a “repair oil” or a floor maintenance oil that can help blend the scratch. For deeper scratches, the process often involves re-oiling the affected area or the entire floor. It’s best to consult the manufacturer of your oiled floor for specific recommendations.
Q7: My dog’s scratches are white and look like they’re in the finish. How do I fix that?
White marks on hardwood floors often indicate that the finish has been damaged but the wood itself is intact. You can try the walnut method or a toothpaste (non-gel) polish. If those don’t work, a furniture repair pen or a specialized scratch repair kit for the finish layer can often touch up wood scratches effectively.
By understanding the different types of scratches and employing the appropriate repair techniques, you can keep your hardwood floors looking beautiful, even with a beloved canine companion. Regular maintenance and preventative measures are your best defense against the inevitable dog claw marks that come with having a furry friend.